Melt All The Ice Controls & Input Guide
Master movement, aim, and menus so every hairdryer second turns into open doors.
Why controls matter in a melt sim
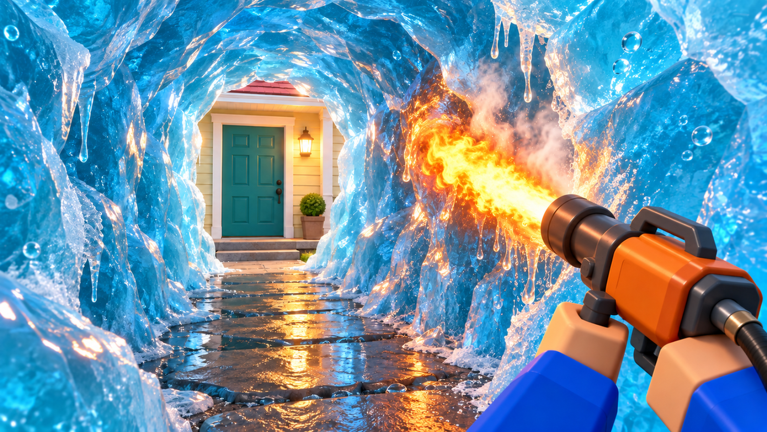
Melt All The Ice! by The Frozen Studio (place 98940528508770) looks cozy, but clear speed depends on how steadily you track ice with heat tools. Bad camera settings waste currency; good inputs make the hairdryer feel twice as strong before you buy anything.
This page covers platform defaults, comfort tweaks, and menu locations that players search for after Getting Started. Pair it with How to Melt for aim technique and Co-op for lobby etiquette.
Core actions (all platforms)
| Action | What it does in this game |
|---|---|
| Move | Walk corridors you already thawed |
| Look / aim | Point the heat cone at blocking ice |
| Use tool | Spray / hold melt on targeted volumes |
| Jump | Hop onto half-melted ledges and stairs |
| Interact / UI | Open shops, classes, codes, and settings |
Exact keybinds follow Roblox platform defaults. If something feels wrong after a Roblox client update, reset binds in Roblox Settings rather than assuming the experience broke.
PC defaults that work well
- WASD to move through thawed paths
- Mouse to aim the heat tool; prefer smooth tracking over frantic flicks
- Left click (or hold) to melt—steady cones beat spam clicks on thick seals
- Space to jump onto ledges the walkthrough mentions
- Esc / Roblox menu for leave, settings, and volume
Tip: lower mouse sensitivity slightly if your aim overshoots doorframes. Heat tools reward slow sweeps along the ice face.
Mobile / tablet comfort
Mobile lobbies are common on Roblox. For this freeze house:
- Use a thumbstick + look pad layout you can hold for long melts.
- Keep the tool button easy to hold—many heaters work better with continuous spray.
- Drop graphics one notch if ice meshes stutter; frame drops hide thinning surfaces.
- Enable haptic feedback only if it does not distract during co-op pushes.
- Landscape mode usually gives a wider aim cone for hallway cuts.
If UI buttons cover the foyer ice, rearrange Roblox touch controls before blaming the shop prices on the upgrades guide.
Console notes
On console, Roblox maps movement and look to sticks, with a face button for tool use. Increase aim assist comfort only if you still miss narrow door seals—over-assist can drag the cone onto vanity ice. Jump remains essential for mid-house ledges described in the rooms guide.
Menus players actually need
After you join the correct place (creator The Frozen Studio):
- Shop / tools — buy heaters ranked on the tools tier list
- Upgrades — melt power and capacity nodes (upgrades)
- Classes / roles — melter, scout, support fantasies (classes, Players Hub)
- Codes — when promos exist (Codes Hub, how to redeem)
- Settings — audio, graphics, and privacy
Button positions can move after patches logged on the Updates Hub. If a menu vanished, soft-rejoin before assuming a wipe.
Camera and comfort checklist
- Camera not clipped inside ice volumes after a big melt
- FOV comfortable for spotting unexplored doors (scout role)
- Volume low enough to hear party callouts in co-op
- No accidental emote binds stealing your melt input
- Confirm you are not in a lookalike experience—see lookalike games
Practice drill (two minutes)
- Stand in the starting thaw zone with the starter heater.
- Trace a horizontal line across one ice wall without lifting input.
- Trace a vertical door outline next.
- Jump onto the nearest half-melted ledge and resume melting.
- Open and close the shop once so your fingers know the path.
Repeat after every tool upgrade. New heaters change cone width; the drill keeps muscle memory honest.
Accessibility and session length
Long thaw sessions strain wrists. Take breaks between wings, swap to a lighter tool if spam-clicking creeps in, and let teammates cover a corridor while you rest—server size 20 exists for shared work, not solo martyrdom. Scripts that auto-hold inputs are a ban risk; read Scripts instead of automating comfort.
Related reading
- Getting Started — first-hour path
- How to Melt — aim cones and corridor cuts
- Rooms & Map Tips — where controls meet layout
- Walkthrough — progression order
- Links Hub — official Roblox destinations
Clean inputs will not replace a better heater forever, but they make every coin from the freeze house count.
Frequently Asked Questions
Quick answers for Melt All The Ice players.
What are the default Melt All The Ice controls?
Roblox defaults: move with WASD or stick, aim with mouse or look pad, use the heat tool with click/hold or the mapped face button, and jump with Space or the console jump bind.
Why does my melt feel weak on mobile?
Often frame drops or a bad touch layout. Lower graphics, use landscape, and keep a holdable melt button. Technique tips are in How to Melt.
Where is the codes button?
It can move after patches. Recheck how to redeem and the Updates Hub if the UI shifted.
Do I need custom keybinds?
Not required. Only change binds if Roblox defaults conflict with accessibility needs or accidental emotes.
Can scripts hold the melt button for me?
Risky. Automation can violate Roblox rules—see Scripts and prefer manual play.